Getting Started with Succulent Propagation: Tips for Beginners
Succulents are loved for their beauty and simplicity but the best part? You can grow more of them from the ones you already have. Whether you’re working with a single leaf, a stem cutting, or baby offshoots, propagation is a rewarding way to multiply your plants.
Related: Best Outdoor Plants to Propagate and Sell for a Profit
What is succulent propagation?
Succulent propagation is the process of growing new plants from parts of an existing one. Whether it’s a leaf, stem, or baby offshoot, succulents have a unique ability to regenerate and grow into entirely new plants with minimal effort.
This makes propagation not only rewarding but also budget-friendly. It’s a fun and simple way to expand your collection without buying more plants. You can also use it as a way to revive leggy or damaged succulents, rescue broken pieces, or share your favorite varieties with friends and family.
Succulents are especially suited for propagation because of how hardy and forgiving they are. Even if your first try isn’t perfect, chances are high you’ll still end up with a few new plants to enjoy.
Tools and supplies you’ll need
Getting started doesn’t require anything fancy. A few basic tools and materials will go a long way in helping you successfully propagate succulents.
You’ll need a pair of clean, sharp scissors or pruning shears to take cuttings or remove leaves. A shallow tray or small pot works well for laying out leaves or planting stem cuttings. Use a well-draining cactus or succulent mix for soil, and keep a spray bottle on hand for misting cuttings during their early stages.
Optional items include rooting hormone, which can help speed up root development, especially for stubborn varieties. It’s also useful to label your cuttings if you’re working with multiple types of succulents, particularly if you want to track their growth or know what you’re gifting.
Make sure all tools are cleaned before use to prevent introducing bacteria or fungus to fresh cuttings.
Understanding different propagation methods
There are several ways to propagate succulents, and the best method depends on the type of plant you’re working with. Some methods are quick and simple, while others require a bit more patience.
Leaf propagation
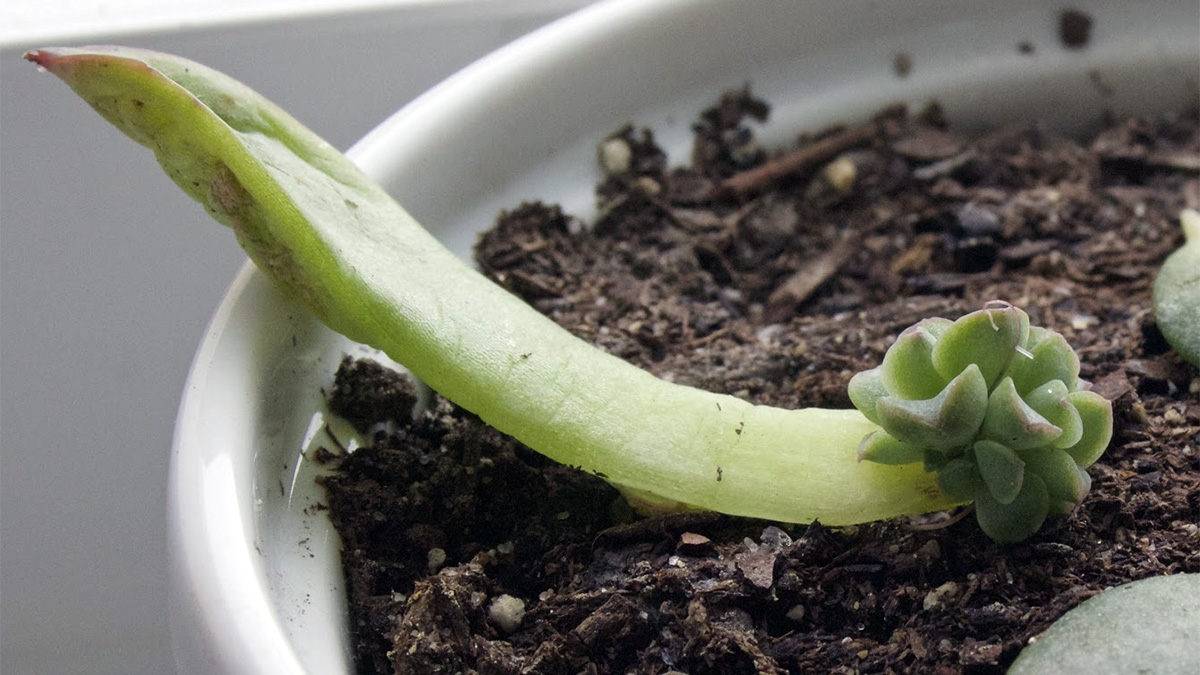
Leaf propagation is one of the most popular and satisfying ways to grow new succulents. Not all succulents can be propagated this way, but varieties like echeveria, graptopetalum, and sedum respond well.
Choose a healthy, plump leaf and gently twist it off the stem. It’s important to remove the entire leaf without tearing it. Once detached, place the leaf in a dry, shaded area for a few days to allow the end to callus over. This step helps prevent rot once the leaf is placed on soil.
Once callused, lay the leaf on top of well-draining soil. There’s no need to bury it. Mist lightly every few days and keep it in bright, indirect light. After a few weeks, you’ll notice tiny roots and baby rosettes forming at the base.
Stem cutting propagation
When succulents become leggy or top-heavy, stem cuttings are a great way to give them a fresh start. This method works well for plants like jade, kalanchoe, and aeonium.
Using clean scissors, cut the stem just below a leaf node. Let the cutting dry out for several days until the cut end has callused. Once dry, place the stem cutting in soil, upright, and water sparingly until roots develop.
You can also remove the lower leaves from the stem and propagate those separately. It’s a win-win: one cutting can give you several new plants.
Offsets and pups
Some succulents, such as hens and chicks or aloe vera, produce baby plants—called offsets or pups—at the base of the mother plant. These are the easiest to propagate.
Wait until the offset is about a third of the size of the parent plant and has a few roots of its own. Gently remove it using your hands or a small tool. You may need to cut it away if it’s firmly attached.
Once removed, let the offset callus for a day or two. Then pot it in fresh soil and treat it as you would a mature succulent. Because these babies already have a head start, they tend to establish quickly.
Propagation in water
Though less common, some succulents can root in water. This method is best for stem cuttings and works well for varieties like pothos-style succulents or certain types of crassula.
Place the cut end in a jar of clean water, making sure no leaves are submerged. Change the water every few days and place the jar in a bright spot out of direct sun. Roots should begin to form in about two weeks.
Once roots are a few inches long, transfer the cutting to soil. Be gentle—the roots are delicate, and transitioning from water to soil can be a shock, so water sparingly at first.
Step-by-step guide to propagating your first succulent
Start by selecting a healthy succulent with firm, plump leaves or stems. Choose your propagation method based on the type of plant you have.
Using clean tools, take your cutting either a full leaf, stem, or offset. Place it in a dry spot out of direct sunlight and allow the cut end to callus for several days. This waiting period helps prevent rot and increases your chances of success.
After the cuttings have callused, prepare your soil. Fill a tray or pot with cactus mix and gently place the cutting on the surface. Don’t water immediately. Wait a couple of days, then begin misting lightly every few days.
Keep the cuttings in a bright area but out of direct sunlight until roots form. Depending on the type and environmental conditions, root development can take anywhere from one to six weeks.
When the new plant has grown visible roots and looks stable, pot it into a small container and begin a gentle watering routine.
How to care for your propagated succulents
Once your cuttings or pups have rooted, caring for them becomes a balance of light, water, and patience.
Water lightly and infrequently. Too much moisture too early can lead to rot, especially while roots are still tender. Let the soil dry out completely between waterings.
Provide bright, indirect light. A windowsill with morning sun or filtered afternoon light is ideal. Avoid intense midday sun until your plant has matured, as young leaves can burn easily.
Avoid fertilizing until the plant has fully established in its new pot, usually after about a month. After that, a diluted succulent fertilizer once a month during the growing season is enough.
Remove any dried or shriveled original leaves as the new plant grows. These are normal signs of progress.
Common mistakes to avoid
It’s easy to get excited and overdo it when propagating succulents, but a few key mistakes can reduce your success rate.
- Overwatering is the most common issue. Cuttings and young roots don’t need much moisture. Water sparingly, and only when the soil is dry.
- Don’t skip the callusing stage. Planting a fresh cut into soil too soon is an invitation for rot. Giving the wound time to seal is essential.
- Using poor-quality or dense soil can suffocate roots. Always use a cactus or succulent mix to allow for proper drainage.
- Timing also matters. Succulents propagate best in the warmer months when they’re actively growing. Cold, damp weather slows root development and increases the risk of rot.
Related: Common Succulent Care Mistakes to Avoid
When and how to repot your new plants
Once your new succulent shows signs of growth and has developed a stable root system, it’s ready for its own pot.
Choose a container that’s only slightly larger than the root system. Too much space can lead to soggy soil and root rot. Make sure the pot has drainage holes and fill it with a well-draining mix.
Gently remove the plant from its propagation tray or original pot. Be careful with the roots—they’re delicate. Place it in the center of the new container and lightly press soil around the base.
Water lightly after a few days to help the plant settle in, and place it in a bright spot with indirect sunlight. From here, care is the same as any mature succulent.
Conclusion
Propagating succulents is a fun, hands-on way to expand your collection and gain confidence as a plant parent. With just a few tools and a little patience, you can turn one plant into many. Remember to start with healthy cuttings, give them time to callus, and go easy on the watering as they establish. It’s a slow process but one that pays off in new growth and the satisfaction of growing your own from scratch.